 Do you use Pinterest for inspiration when you’re looking for crafts to do in the classroom? Pinterest is full of holiday craft ideas, and with a little creativity, you can easily find ideas that can be combined with language learning.
Last weekend I went hunting on Pinterest to find ideas on painting eggs with nail polish. One of my daughter’s favorite games right now is “Name the Nail Polish”. We gather all of our bottles of nail polish and put them in her glittery treasure box. She pulls the bottles out one by one and we take turns coming up with fun names for the colors. Twinkle Twilight…Party Perfect…Salmon Suede…Confetti… Sometimes we play this game out loud together, and other times we write the words down and compare the color names. We’ve played this game with up to four people (boys included), and it works best when we have lots of different colors (at Auntie K’s). Sometimes we even vote on the color names to see which ones we like best. When we’re done, we look at the bottom of the bottles to see what the real names are.
I was delighted that my “nail polish Easter eggs” search on Pinterest brought up so many ideas for coloring eggs. There were ideas for painting real eggs as well as plastic eggs. I was skeptical that nail polish and water would work well on plastic eggs, but was excited to find out that it actually worked when I tested it out!
This particular idea, “You’ve Been Egged” would make a great classroom activity or weekend project. You could “egg” another classroom at your school, or invite your students to “egg a neighbor” over the Easter weekend. Here is a handout you can give your students if you want them to do this activity at home. *
You will need:
- Nail polish in lots of colors
- Plastic eggs (one for each student – or if you can find a giant one, you could do this as a group activity)
- Empty plastic containers, such as yogurt containers
- Empty egg cartons (enough so that each student’s egg has a spot to dry)
- Water at room temperature
- Plastic gloves (if you don’t want nail polish remover around kids)
- Small slips of paper for writing Easter messages
- A big basket or box for delivery (unless you plan to hide the eggs)
Step 1: Color Name Game
1. Ask each student to bring in one bottle of nail polish. (If you have time. If not, grab some bottles from the dollar store, or bring in your own. Make sure you have lots of colors!)
2. Gather all of the bottles of nail polish and place them in a container. Look at a few of the names on the bottles and share them with your students as examples. Nail polish is almost never called “red” or “pink”. Check out O.P.I. color names on Pinterest.
3. Pick out one bottle at a time and show it to the students. Have students write possible color names on the board or on a piece of paper (or do this orally). Remind students that color names can be one word (Jasmine), two words (Army Green), or a phrase (Pretty in Pink). They are often rhyming: Razzle Dazzle. Or alliterative: Purple Passion. Have fun!
4. When all of the color suggestions have been written down, look at the actual name on the bottom of the nail polish bottle. Help your students understand any difficult vocabulary. You could even have students start a word list called “Words I Learned from Nail Polish” (handout).
5. Vote on which nail polish names are the best for each bottle!
Step 2: Decorating
For young students, you will need a teacher or parent to supervise at an art station and possibly handle the nail polish.
6. Have each student (or a pair of students) fill a plastic container with water (about 3/4 full). Teach your students the word “room temperature”, and make sure they use water that isn’t too cold.
7. While the water is reaching room temperature, instruct your students to choose some nail polish colors that go nicely together. Place a few drops of each color into the water. (Dip the nail polish brush into the bottle and hold it over the water. This works best with bottles of nail polish that are quite full. Or, shake the bottle over the water for more paint.) If your students are handling the polish, have them wear gloves so they don’t need nail polish remover. They may also need art smocks!
8. Have students drop the plastic egg into the water and push it around until it picks up all of the paint. Repeat to make lots of colorful eggs! If you’re doing this at home, and you have lots of nail polish you don’t mind using, you can get messier, and your eggs can look really colorful like this.
9. Place the painted eggs in an empty carton to dry.
Step 3: Adding an Easter Message
10. Have your students write a message to go inside their egg. When the egg is dry, place the message inside. If you taught your students these spring and Easter idioms, you could have them place one inside their egg. Their messages could teach other students in the school new idioms. You could also use Easter jokes. Or, you could have your students write the colors of the nail polish they used. You may want to place a wrapped chocolate egg inside each plastic egg.
Step 4: Egging Your Friends or Neighbors
11. Deliver the surprise eggs in a basket when the students in another classroom are outside or gone for the day. Leave a sign that says “You’ve been egged!”. You could also hide the eggs around a classroom and send the kids on an Easter egg hunt. If you’re doing this at home, place the eggs in a basket outside a neighbor’s door.
*Consider the age of your students before you do this craft in the classroom. Are they able to work with nail polish safely? Do you have enough adults around to supervise? If you have a large group, you may want to save the decorating (Step 2) for an at-home Easter weekend craft. For very young students, you could use crayons (come up with fun names for each color) and paper instead of plastic eggs and nail polish. The Easter messages could go on the back of the paper eggs. Adapt as needed. Happy Easter!
Related
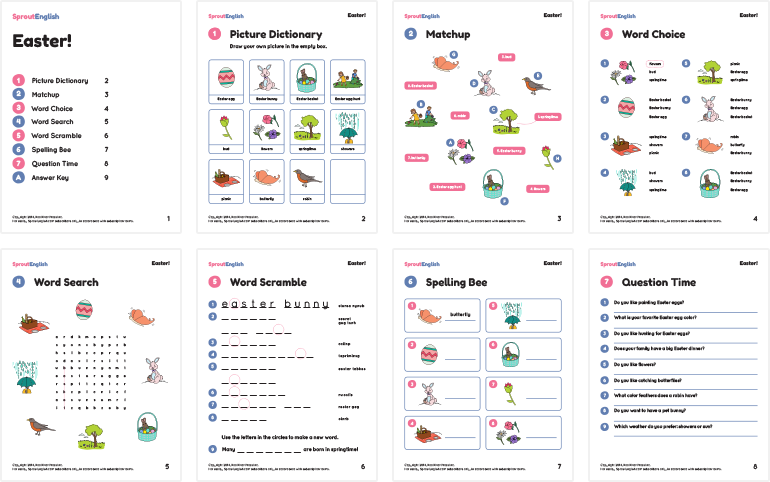
Find Sprout English’s Easter Vocabulary lesson in the Word Bank – Holidays.


Purchase a subscription to access all our Young Learner resources at a low price today!

